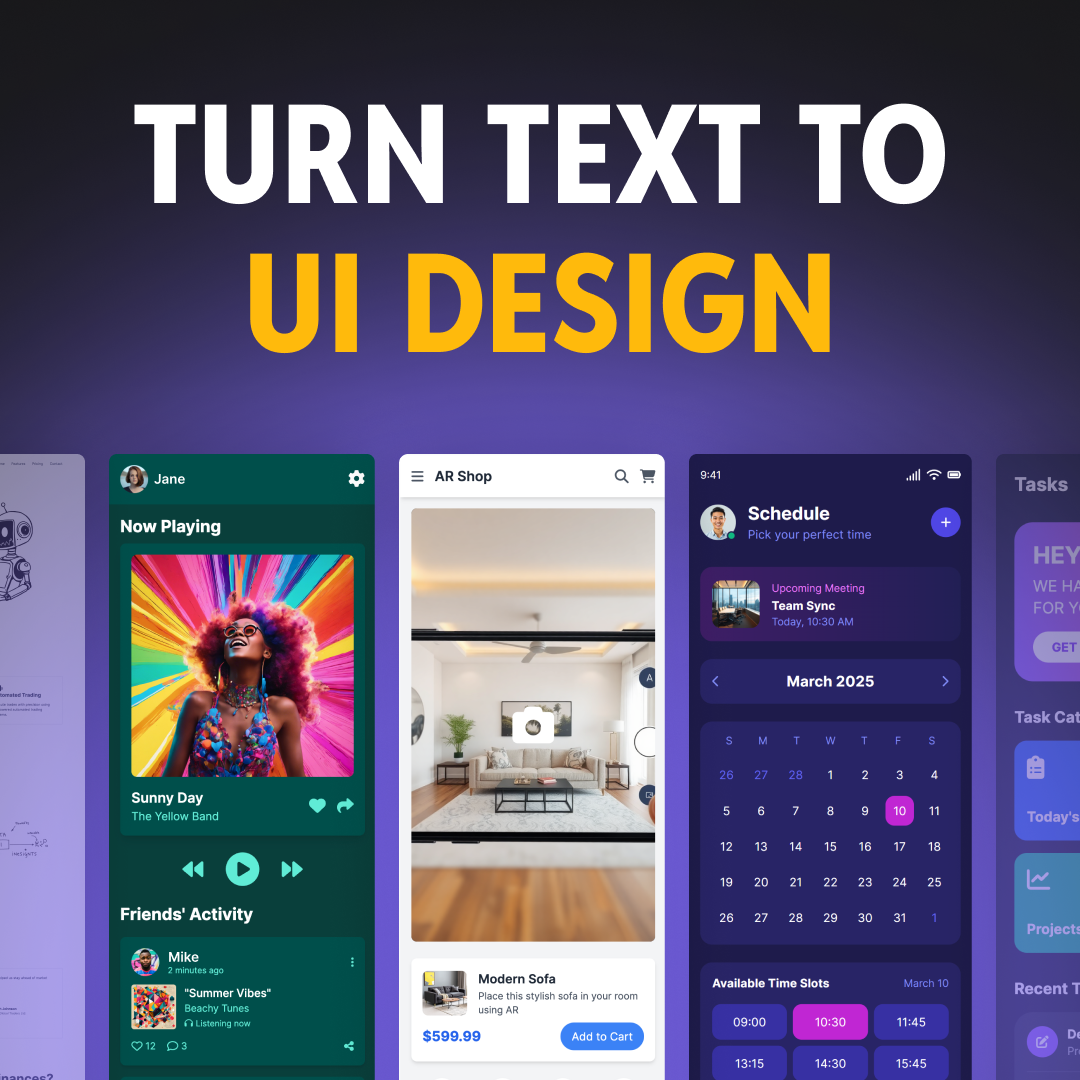


![UX Prototyping in UX Design Guide [Free Checklist]](https://www.datocms-assets.com/16499/1614679060-prototyping-2.jpg?auto=format&dpr=0.42&w=3840)
Prototyping is a crucial step in the UX design process that allows designers to bring their ideas to life and tackle pressing issues. But, it's important to note that a prototype can range from a simple sketch to a highly detailed and polished interface.
So, whether you're a beginner or a seasoned pro, get ready to dive into the exciting world of prototyping. From high-fidelity to low-fidelity, the tools you need, and how to create a prototype, this article will give you all the information you need to bring your ideas to the next level.
So, let's get started and turn your brilliant ideas into reality!
What is prototyping?
The word "prototype" comes from the Greek "prōtotypon," which means "first impression/mold of something." In UX design, prototypes serve as a means to test the flow of a product and locate potential issues associated with it. It's important to note that prototypes tend to evolve, and this is their essential quality.
There's a commonly held belief that one or two iterations should be enough to identify a product's most significant issues. However, it's important to prototype often and as early as possible in order to ensure a cohesive product and a good user experience.
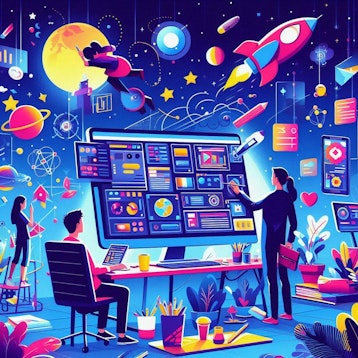
In the context of the design process, prototyping is the fourth stage of design thinking, which aims to validate solutions to the problem being tackled. The process of design thinking is iterative, and it's often described as a framework for innovation. The diagram below illustrates the path from empathy to definition, ideation, prototyping, and ultimately testing.


Design Thinking Process Diagram
Why prototype?
We’ve already mentioned that a prototype is an early product version aimed at validating the product concept. Let’s dive a little deeper into the benefits of prototyping in User Experience design.
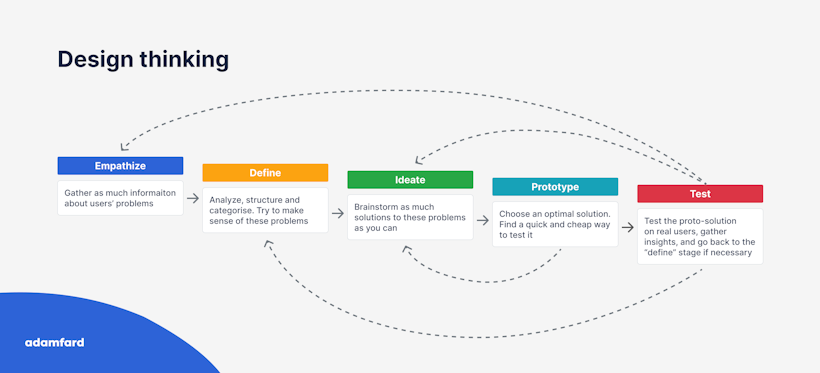
The quintessence of the value of prototyping is that it’s quick, cheap, and doesn’t require coding. Furthermore, that’s how you validate your assumptions and refine your solution into something your users find convenient. No prototyping almost always results in poor usability, confusing flows, and is extremely frowned upon by experienced designers.
Another application of prototyping is developing a tangible deliverable you can present to potential clients or investors. That way you can better articulate your vision and enhance the pitch deck with the early product design and user flows.


To summarize, prototypes helps you:
It provides valuable contextual feedback;
It significantly reduces development time and costs;
It allows to detect usability problems or UX architecture issues early on;
It acts as a reference tool for developers;
It validates assumptions and tests hypotheses;
It can be used for user research and further optimization;
It can be used as something tangible to show to investors;
It allows you to have a design to test the usability on.
Kinds of prototyping
Prototypes usually go through multiple iterations of refinement, so that you don’t invest resources into bad solutions. If you are to realize that your solution sucks, it’s better if it happens on the stage of rough scribbles, rather than a polished piece of design. That’s a philosophy that is prevalent in the design thinking process.
Low-fidelity prototypes
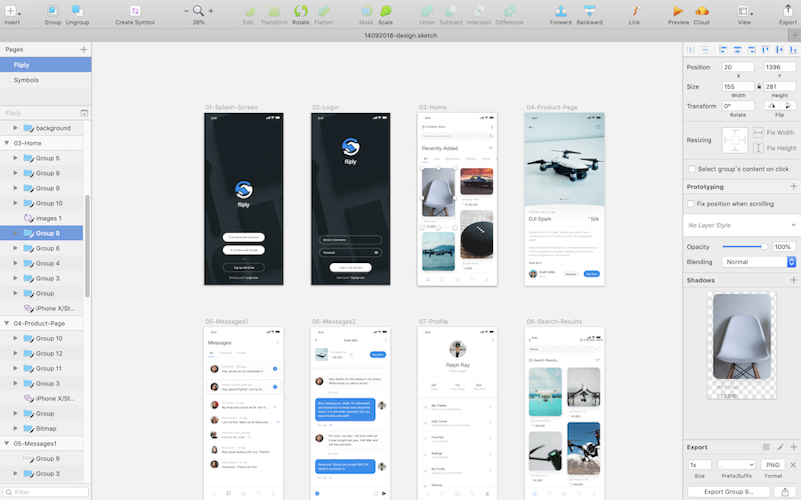
Low-fidelity prototyping is a way to translate a high-level design vision into something tangible and testable. Generally, it’s easy to spot a low-fi prototype when you see one. They are likely to be black-and-white and lack any branding elements. Many input fields will be filled with lorem ipsum copy. Pictures will be replaced with placeholders. However, the key attribute of any prototype regardless of its fidelity is that it’s interactive.


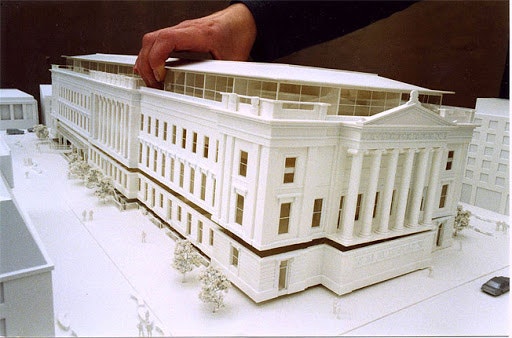
A good non-digital world analogy to low-fi prototyping would be the building model architects make to visualize their vision. Building such a model obviously requires fewer resources than constructing an actual 6-story building. Therefore, if there are any tweaks to be made, you can adjust the prototype.


High-fi Prototypes
Once your rough prototype endures through scrutiny and early feedback, it’s time to flesh it out. In terms of the UI&UX process, the low- to high-fidelity evolution looks something like this:


To be fair, the gif above features wireframes and not prototypes per se, but since wireframes are often the building blocks of prototypes, we thought it’d be useful for you to see it.
Unlike low-fidelity prototypes, the high-fi ones feature detailed and realistic interface elements. All content is either real or similar to the content that will be displayed in the launched version. Furthermore, the interactions and animations will be very close to a coded app.
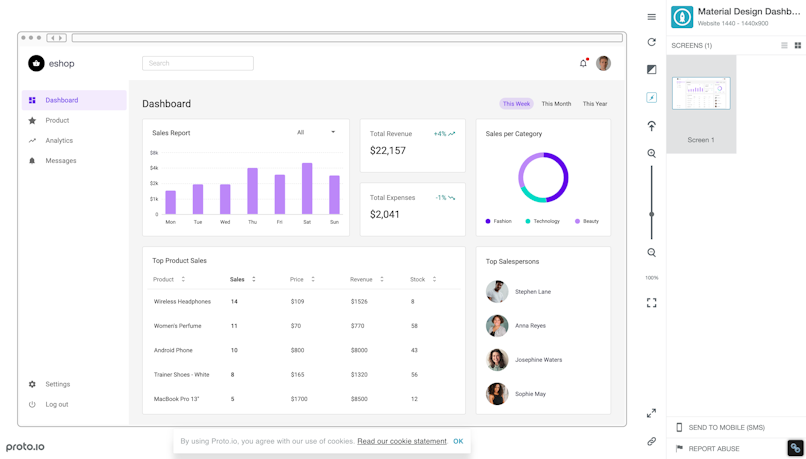
By the way, we’ve embedded an example of a high-fidelity prototype below. Feel free to click around to get a feel of it.
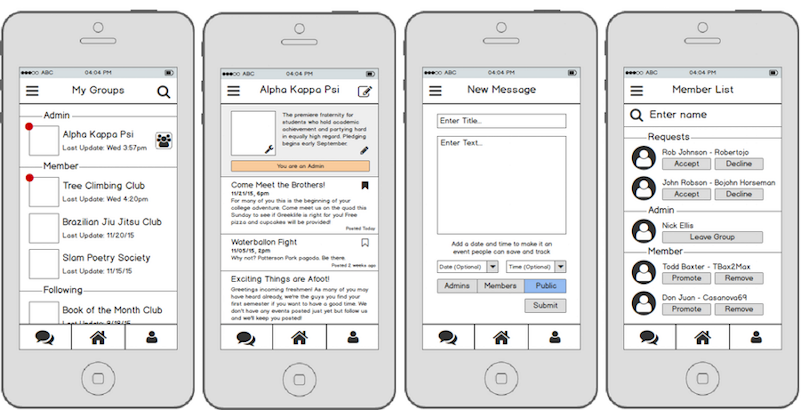
Interactive Prototype created in Figma
Where to start
Now that you have an idea of what prototypes are and what kinds of prototypes there are, let’s go through the process of creating one. As mentioned before, a prototype is not something that exists in a vacuum. Being the fourth stage of the design thinking process, prototypes accumulate the knowledge of the previous three stages and set up the scene for the fifth stage (testing).
Before moving on to the prototype stage, hopefully, you will have completed the other stages. If that’s the case, let’s move on to how you should go about creating a prototype.
Before linking multiple screens together to create a prototype, you obviously need some designs. These don’t have to be polished. Even rough sketches would do at the early stages. However, before laying a single pixel of a design, you should map out the whole experience first. One of the best ways to do it is to devise an information architecture,
Information Architecture
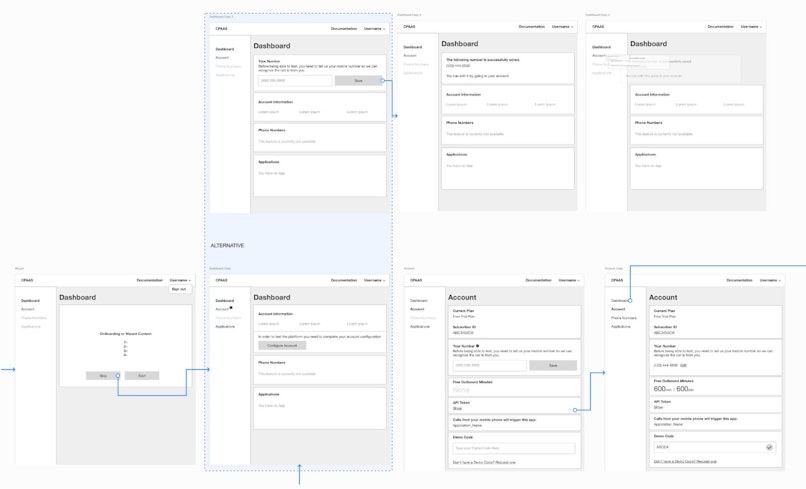
You can’t just create a random set of screens and hope that the experience will end up being cohesive. You should map out the whole product blueprint from a bird’s eye view first. Special bonus to you if you actually took the time to conduct a card sorting session, since the information you’ve gathered can then be turned into information architecture. The latter usually looks something like this:


The more complex the product is, the more complex the map is going to be. Such a blueprint is vital to align not only multiple designers, but also developers, product managers, and other stakeholders in their vision for the final product.
Wireframing
Now that you have a map of the product, you can get into individual screens and modules. Nothing fancy, rough scribbles would do for now. Once the scribbles are cohesive and make sense together digitize the wireframes.
For the sake of prototyping, wireframes need to only be detailed enough for the stakeholders and users to understand what the product is about and how it works.


The tools
The mechanics of creating a clickable prototype is probably the most trivial part of the process. In most prototyping apps it looks something like this:
You’re essentially connecting different elements of the wireframes with one another. It might look a little overwhelming, but it’s not as complicated as it looks.
Let’s go through the tools you can use for prototyping.
General tools
A piece of paper and a pen
Early wireframes can totally be sketched by hand. We personally like to take a break from the digital tools. The advantages of such approach include:
Low cost
No technical expertise required
Very early feedback
A fun team activity
Among the shortcomings we would highlight the following:
Testing and feedback can only be effectively gathered in-person (no remote testing);
You’ll still need to eventually digitize the prototypes.


Figma
Figma is a universal design tool. There are very few UI&UX design tasks the tool can’t do. Here are a few of the advantages of using Figma:
Any person with access to the internet can click through the prototype;
The app's free version is sufficient for prototyping;
Figma alone can take you through the whole design process;


Sketch
Sketch is fairly similar to Figma. However, you’ll have to upload the prototype to the could, which is an extra chore. Additionally, unlike Figma, you need your users to have a MacBook and sketch. Needless to say, it’s extremely inconvenient.


Adobe XD
One of the older tools on the market. It's benefits include:
You can test voice interfaces as well;
Supports 3d transformations (not just on the X and Y axis, but the Z one as well) which is great for transitions and animations;
Integrated with other Adobe tools;
You can easily update the prototype materials.


Specialized tools
Other than the all-purpose design tools, you can also find tools that were designed specifically to be used for wireframing and prototyping. Here are a few of such tools you can explore:
Balsamiq. The tools is used most often for low-fi wireframes. Designers tend to switch to other tools for mo hi-fi work.


Proto.io. This tool can create complex animations and behaviors (compared to Figma, Sketch, AdobeXD). However, it requires to re-create screens or part of the components. The usage is sometimes slightly different and has a somewhat steep learning curve for complex interactions.


& Plenty more. There's plenty of tools on the market, but we decided to show you only those that we used.
By the way, we have a whole article on the tools a designer would ever need. Check our guide on UI&UX tools here.
The prototype-product threshold
So far, we've been discussing no-code prototypes only. We also wanted to take a minute to mention that you can go as far as to code the prototype. There are a few use cases, where it can be useful.
One such instance could be to test it with multiple people without the guidance of a designer or to show something to stakeholders. However, at this stage, a rule of thumb is less code – fewer problems.
What’s next
Once you already built a clickable prototype, the next step is to test it with actual users. In short, the process includes recruiting users, preparing the scripts and planning, conducting the actual interviews and then analyzing the results. You can read more about it in our article on usability testing. The article also features a free downloadable checklist 😉.
Thank you for sticking till the very end, see you in out next article!


Prototyping in UX Design Checklist
Check out our free editable prototyping checklist to validate your designs fast and with minimum effort.
Download Free Checklist