


If you’ve ever sketched wireframes manually, you know the struggle—it’s a time-consuming and iterative process. Spending countless hours sketching and constantly going back and forth with your team can be exhausting.
But what if there was an easier way to create a blueprint of your interface design? Luckily, an AI-powered tool like UX Pilot can help.
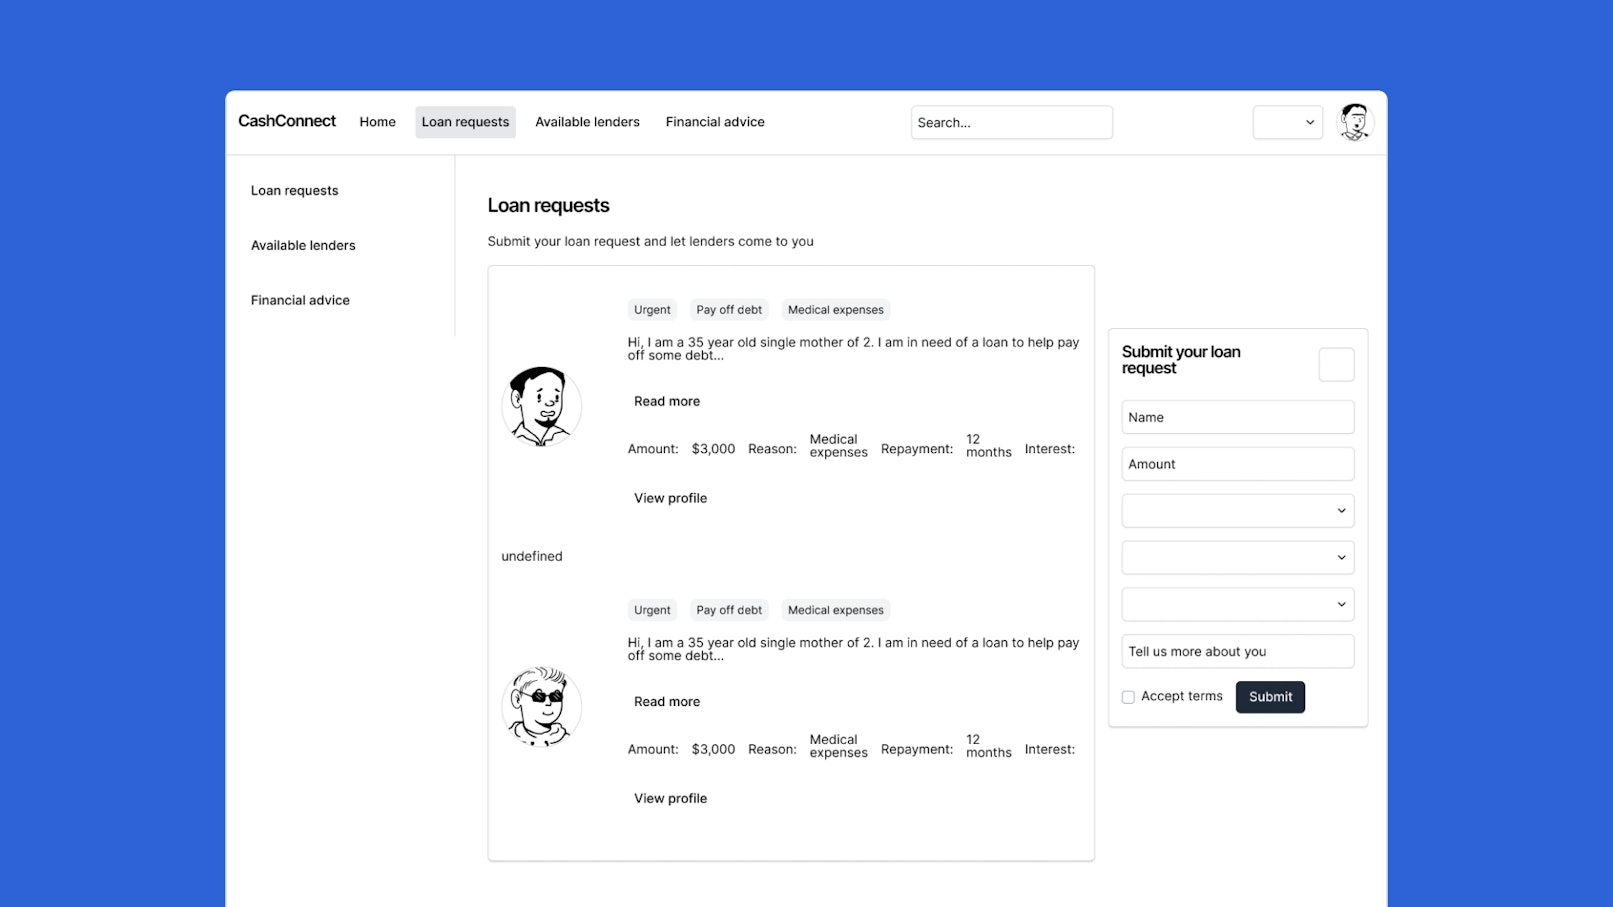
UX Pilot AI Wireframe Generator lets you turn a simple text prompt like this: “A platform that connects cash-strapped individuals to potential lenders.” into wireframes like this in seconds:


Pretty impressive, right? Or perhaps, you’re already familiar with using AI to generate wireframes. In that case, let’s go straight to what makes this tool unique.
Unlike other wireframing tools, UX Pilot Wireframer goes beyond simply swapping components within a predefined structure to suit your design prompt. In fact, there’s no limit to the structure or layout your generated wireframes can take. So, whether you have a basic design concept or an out-of-the-box idea, you’ll get wireframes that perfectly align with your vision.
And the best part?
You can achieve all of this right in your Figma design file. Want to know how? Keep reading as this article will show you how to generate wireframes with UX Pilot in Figma. And just in case you’re wondering why you should incorporate AI in your wireframing process, we’ll answer that too.
So, if you’re ready to explore the wireframing wonders of UX Pilot, let’s get started.
But first, what are wireframes and why do you need them?
A wireframe is a blueprint or skeletal outline that defines the layout and structure of a website or app’s digital interface. It typically involves using shapes, placeholders, and text to outline the main structure of a digital product without including detailed visual elements like color, images, and typography.
No one wants to experience the frustration of spending time and effort perfecting a digital product, only to discover that its core functionality is flawed. Wireframing can prevent this. Much like architectural blueprints for buildings, wireframes are a low-commitment way of defining an interface’s structure and functionality before investing heavily in design details.
How to generate wireframes with UX Pilot Wireframer
We’ll be taking you through a four-step process for creating quick wireframes with UX Pilot Wireframer:
Create a UX Pilot account
Launch the plugin in Figma
Prompt the AI
Edit your wireframes
Now let’s dive right in!
1. Create a UX Pilot account
To access UX Pilot’s features, you’ll need to sign up. Simply head to uxpilot.ai and click the ‘Start for Free’ button. You can sign up using Google authentication or your email address. To sign up via email, just enter your details, verify your email, and you’re all set up.
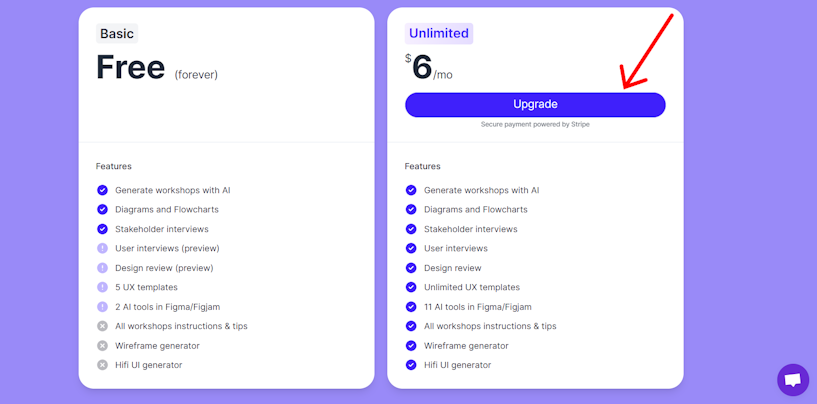
With your account all set up, you can start exploring the magic of UX Pilot for free. But to access the full range of features, including the hi-fi UI generator, you’ll need to upgrade to the paid plan which only costs $6 a month. This process is straightforward too.
On the homepage, click the ‘Upgrade’ button located at the top of the screen. Then, under the unlimited plan, click ‘Upgrade’ and follow the prompts to complete your payment.


2. Launch the plugin in Figma
From your Figma design file, go to the plugins community and search for UX Pilot. Then select UX Pilot AI: UI Design & Wireframes from the available plugins.
Once the UX Pilot pop-up window appears, it’s time to prompt the AI.
3. Prompt the AI
Entering your text prompt is straightforward as the UX Pilot interface is user-friendly and intuitive. Let’s take a quick tour of the interface:


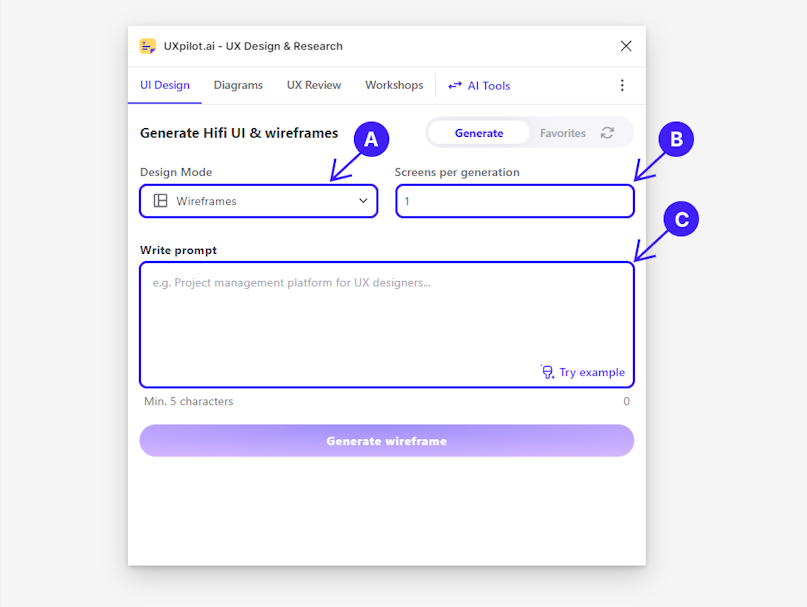
A. Design mode: Choose your design fidelity — wireframe or hi-fi.
B. Screens per generation: Select the number of screens you want the AI to generate. You can choose between 1 to 4 screens.
C. Write prompt: Enter a brief description of your design project in plain English. The description can be as vague or as detailed as you want. Bear in mind that the more detailed your description is, the higher the chances of the output matching your vision.
In the box labeled ‘Write prompt’, enter a brief description of what you want to create. For our first example, we’ll ask the AI to generate wireframes for a platform that connects cash-strapped individuals to potential lenders.
Here’s our prompt:


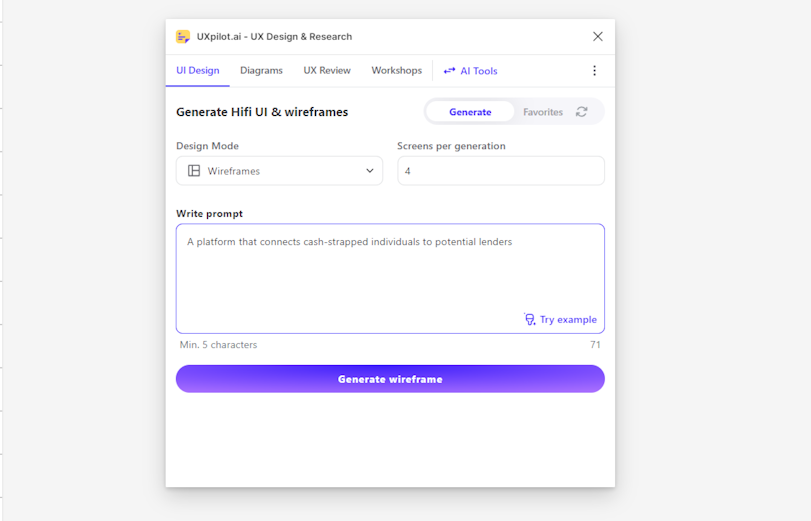
Text prompt: A platform that connects cash-strapped individuals to potential lenders.
Once you’ve entered your description, click ‘Generate wireframes,’ and you’ll have your wireframes in a matter of seconds.
The AI-generated homepage
And just in case you haven’t already noticed, one of the many benefits of using UX Pilot Wireframer is that it can generate multiple screens at once. In this instance, the AI generated four screens as per our request:


Just by entering a simple text prompt, the AI was able to generate some pretty impressive features for the homepage of our lending/borrowing platform, such as:
Loan request form
User dashboard
Search bar
Loan requests cards
Available lenders cards
Messaging feature
With smart ideas like this, you’ll have a solid foundation to unleash your creative genius.
Now, let’s take things up a notch with another example. This time, we’ll ask the AI to generate wireframes for a not-so-common idea. Here’s our text prompt:


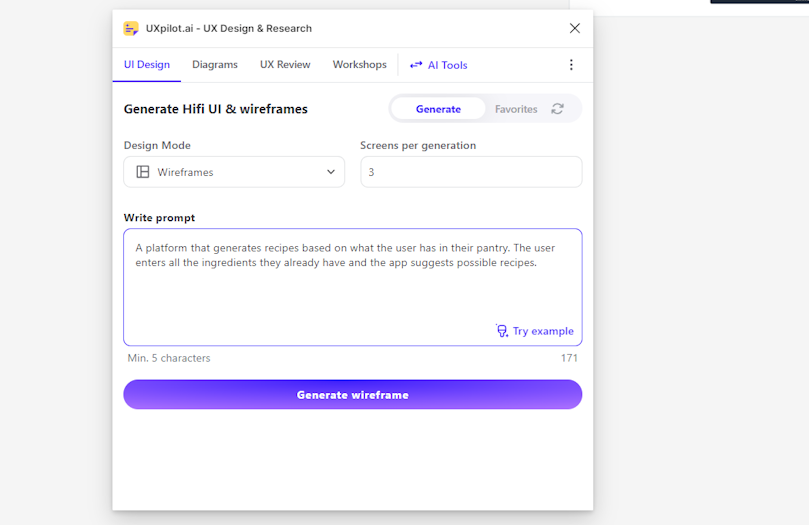
Text prompt: A platform that generates recipes based on what the user has in their pantry. The user enters all the ingredients they already have and the app suggests possible recipes.
And now, let’s take a look at the output.


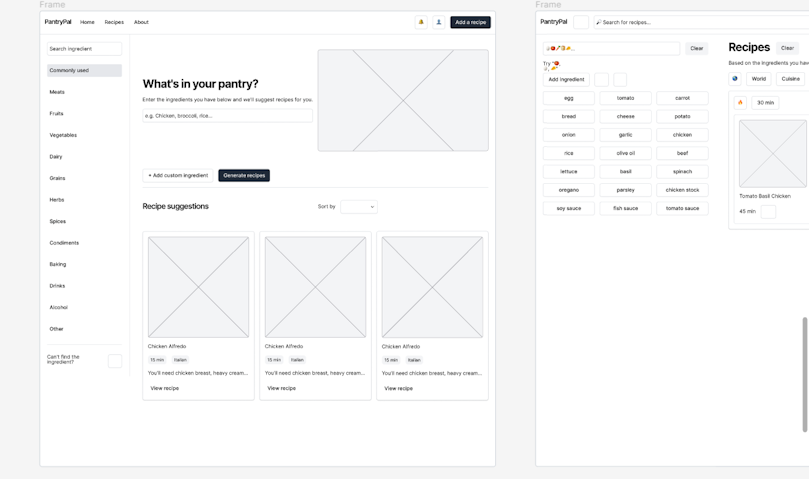
AI-generated homepage
The generated wireframes align perfectly with the inputted prompt, showcasing features like:
Input field to enter available ingredients
List of commonly used ingredients
Recipe suggestions
Recipe page
As we’ve seen from the two examples, the AI generator will produce the key screens in your website or app. You can use them as a foundation and build upon them by adding more screens to complete your user flow.
4. Edit your wireframes
Editing your wireframes is as straightforward as editing any of your Figma designs. Select the element you want to change and edit it like you would any other design in Figma.
Having explored the “how,” it’s time to move on to the “why”. Let’s tell you why you should use an AI tool like UX Pilot in your wireframing process.
Why use AI for wireframing?
During the design ideation phase, it can often be challenging to come up with ideas from scratch. So instead of starting with a blank canvas, which makes the task seem even more daunting, you can let AI give you a head start.
As we’ve seen from the examples above, using AI in your wireframing process doesn’t just speed up your workflow by allowing you to experiment with ideas rapidly; it sparks new ideas you might never have thought of. These fresh ideas can be the building blocks for some truly innovative designs.
Wrapping up
We’ve shown you how to take your ideas from a simple text prompt to wireframes in seconds with UX Pilot Wireframer. By leveraging the power of AI, you can save time and energy, allowing you to focus on refining ideas rather than starting from scratch. And the best part is that you achieve all this without leaving your Figma design file.
So, what's stopping you from giving UX Pilot AI a try?